• Home
  • About
  • Archives
  • Contact

Kristen Anne Glover

Five in Tow

  • Marriage
  • Parenting
  • Faith
  • Christmas

Simply Homemade: Craft a Peacock Lamp Shade

Simply Homemade

Christmas does not have to break the bank.  In fact, it shouldn’t.  Going into debt or spending more than you should is no way to show people you care about them.  That’s why I began this Simply Homemade series.  I wanted to release you from the obligation to spend too much by coming up with some creative gift alternatives you can make yourself.

Every single idea I’ve shown you so far can be made in very little time and requires no special talent, fancy equipment, or complicated directions.  They’re just simple. 

Today’s idea is no exception. 

How to Craft a Peacock Lamp Shade

Peacock lamp shade

This project is so simple, you really don’t need a tutorial for it. 

I purchased a couple of accent lamps at a home store for under $10 each.  They are pretty enough, but the lamp shades are kind of eh.  Certainly, they wouldn’t make a very memorable gift, not with vanilla lamp shades that aren’t special at all.

Fortunately, it takes very little effort to transform a boring lampshade into something one-of-a-kind.  All you need is a bit of ribbon, a peacock feather, and an interesting jewelry finding. If you don’t have peacocks running around your yard, you can order feathers here.

Peacock Lamp shade before

Pre-embellishment

A dear friend of our family gave me a bunch of peacock feathers a few years ago.  She collected them from the peacocks that roam about her mother’s property on Whidbey Island, Washington.  Every year, the birds molt, and she goes about picking up the long, jeweled plumes because they are too beautiful to leave out in the misty rain.

That’s one of her feathers in the picture above.  You’d better believe I moved those babies all the way from Washington to Texas this summer, even when the packers looked at me funny and none of them could find a box the right size.

Using fabric glue, I wrapped the ribbon around the top of the shade, being sure to start and end on the seam that was already there (neatness counts).  I tried to use as little glue as possible because my ribbon is sheer and I didn’t want globs of glue to show.

Peacock lamp shade tutorial

The ribbon was a bit too sheer for me, so I wound it around a couple times, secured it with the clip, and let the glue dry.

Then I created a bow, ran the shaft of feather through it, arranged it the way I wanted, and secured the whole thing with a jewelry finding and some hot glue.  The jewelry finding is important because it hides and holds the feather in place, but you could use anything you like, from a button to an old key.  I just happened to have a couple of those faceted gems leftover from another project (besides, I kinda liked the added bling).

That’s all there is to it. 

I love how this lamp looks when it is off or on.  When the lamp is off, the peacock feather adds a splash of sophisticated color.

Peacock lamp shade OFF

Peacock lamp shade OFF

When the lamp is on, the peacock feather looks like a pencil sketch.

Peacock Lamp Shade ON

Peacock Lamp Shade ON

I made a pair of these with slightly different bases to give away.

But for now, they’re adding a little light around the corners of my rooms.  I love having little pools of light in unexpected places around my home.  Don’t you want to walk into a room where a cozy light is shining?

Peacock Lamp ShadeThat’s what makes this gift so great.  Most people like light, and in the winter, we never quite get enough of it.  Give one or two hand-finished lamps and it’s sure to be appreciated.
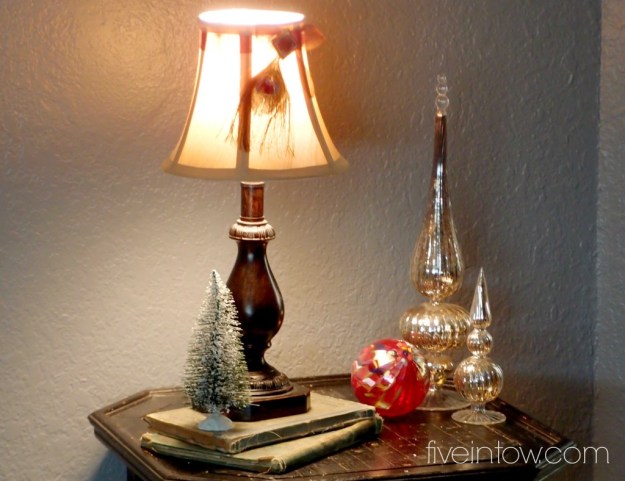
Peacock lamp shade and tableAnother project is coming right up!  Stay tuned for another simply homemade idea tomorrow.

Save

Crafts 1 Comment

Simply Homemade: Snowman Votive Ornaments

Simply Homemade

A few  weeks ago, a friend shared a cute idea on Facebook.  Someone had taken an LED votive candle and turned it into a snowman by drawing eyes on the candle and plunking a little top hat on its head.

The idea was super clever, and I had a dozen little votive candles left over from my Pottery Barn knock-off chandelier project.  What a great way to use them up!

But the snowmen I saw were kind of…boring.  Drawn-on eyes were cute, and top-hats are nice, but I wanted my votive snowmen to be extra-special because I wanted to give them to my kids for their Christmas ornaments this year.

I wanted my snowmen to have real knitted hats and eyes that looked like rocks, just like real snowmen.  I wanted cheery scarves and rosy cheeks and sweet little smiles.  In other words, I wanted to take a bunch of boring, old LED votive candles and turn them into something my kids would treasure.

I stared at my votive candles, and soon, and idea began to take shape.

Votive to Snowman

From votive to snowman

This is exactly what I had in mind for my kids’ ornaments.  What a sweet little snowman he turned out to be!

If you’re like me, you’re going to want to make a whole tribe of these to give away.  And why not?  They’re much easier to make than a real snowman, and you won’t even have to put your mittens on to do it.  But go ahead and sip some hot chocolate while you work.  It helps to make better snowmen, trust me.

How to Make Snowman Votive Ornaments

Snowman votive hat

Make a snowman hat out of an old sweater

I wanted to make snug little hats for my snowmen, but I can’t knit.  Besides, who has the time for that?  Instead, I rustled around in my stash of clothes destined for the thrift store and found the perfect red sweater.  Fleece would have worked well, or just about any fabric that has a little stretch to it.

It only took a few minutes to make hats for all five of my snowmen ornaments.  You can probably figure it out from the photos above, but just in case, here’s the step-by-step.

1) Cut a strip of fabric about twice as long as the votive, but not quite twice as high.

2) It works best if the fabric scrap is shaped like a trapezoid.  If you don’t remember what a trapezoid looks like (high school geometry was a long time ago, I know), see the photo above.

3) Use a glue gun to put a strip of glue at the top of the trapezoid.  If you have a sewing machine, you could sew instead of glue, but there’s no need to be an overachiever.

4) Pinch the fabric together to form the top of the hat.  Don’t burn your fingers!

5) Glue the back seams together.

6) Roll up the bottom of the hat and secure it with a bit of glue.

Votive snowmen

Ta-da!  Your snowman won’t be bald!

Finish the hats with jingle bells and pom-poms.  I also added little touches to each one like sequin “snow” and holly berries made out of beads because I think these details elevate the gift from homemade to hand-crafted.  It doesn’t take much more time to add the details, but the overall impression is that someone cared enough to make it special.

Glue the hats to the tops of the votives, being sure not to block the “on” switch on the back, or access to the battery.  You’re welcome.

Use a pink permanent marker to draw rosy cheeks on the faces, then use two different sizes of seed beads for the eyes and mouth.  If you’ve got Super Glue, use it.  Hot glue makes too much of a mess on these tiny beads, but you need a strong glue or they will pop off.

Snowmen votive ornaments

Snowman votive ornaments

Pick out some Christmas ribbon, tie it in the middle, and glue it off to the side of your snowman’s “chin” for a scarf.  A few inches is all you need!

I bought a bunch of Christmas ribbon on clearance last year so I happened to have enough different kinds of red ribbon to give each of my five snowmen a different scarf.  My kids will love the fact that they each get their own, unique snowman ornament.  No two scarves or hats are the same!

Snowman votives

What do you think?  Are you ready to make a batch of cheery snowmen for yourself?  You can order votive candles here to get started.

Don’t forget to pin this idea to your Christmas board, or share it with a friend so they can make one for you!

Variations: These snowman votive ornaments don’t have to be saved for the tree!  Here are some ways they can be used to brighten up the holidays.

  • Use them with a gift tag to decorate your wrapped presents.
  • String them on a ribbon and make a decorative garland for the mantel or mirror.
  • Tie one to a gift card to add a little personal touch to an otherwise impersonal gift.
  • Add a magnet to the back and bring a little Christmas cheer to the fridge!
  • Place the snowmen on an outdoor wreath and turn the candles on when expecting company.
  • Put one by your child’s bed as a night-light.

Save

Crafts 10 Comments

Simply Homemade: Grow an Amaryllis

Simply Homemade

I love decorating my home for Christmas.  I look forward to it for weeks ahead of time and can hardly wait until the day after Thanksgiving when I haul out all the boxes and the kids and I get to work.

For a whole month, everything looks magical and special. 

Then, January rolls around and all the special things are replaced with the ordinary once again.  It puts me in a bit of a funk every year.

That’s where this Simply Homemade gift comes in.  This present will wake up and bloom just as the holidays are winding down and the cold, dreary days of January set in.

It’s an amaryllis.  

Amaryllises rival poinsettias for the most popular live Christmas plants.  People love to use them as centerpieces or accent plants during the holidays because a bulb planted in November will bloom just in time for Christmas.

We’re a little late for getting our amaryllis to bloom by Christmas, but that’s what makes it a perfect gift.  It will bloom just when something fresh and pretty is most appreciated, after the tree comes down.  I even wrote a little poem to give along with the gift.

Amaryllis poem

You can add the poem to your gift if you’d like, or come up with something of your own!

I love the idea of gifting a little bit of spring to a loved a one for Christmas, and giving an amaryllis couldn’t be easier.

How to Grow (and give) an Amaryllis

The first thing to do is to purchase an amaryllis bulb.  These are sold online (Google Amaryllis bulbs and you’ll have a zillion options) or in just about any store that sells garden items.  They are inexpensive too.  The bulbs I purchased from the Army Exchange were about $2.50 each.

Amaryllis bulbs come in a variety of colors, from the traditional Christmas red to white to pale pink.  You can even find candy cane amaryllis!  The ones below are sold on Amazon (click on the photo if you want the link).

Candy Cane amaryllis

Choosing the bulb to plant is probably the hardest part of this whole project!  The rest is just as easy as playing in the dirt.

How to Force an Amaryllis

1) After you’ve chosen your bulb, pick a pot that is not much bigger than the bulb itself.  Aim to have about 1 inch of dirt around the bulb.

I found a great pot on clearance at Target.  As you can see from the photo, it’s too big for a single bulb, so I planted three.  Amaryllis bulbs like to be cozy, and they bloom better in tight quarters.

2) It’s important to provide good drainage so the bulb doesn’t rot.  I put an inch of sand in the bottom of the pot to help with that, and mixed some sand in with my potting soil.

3) Pack the bulb firmly in soil, leaving the top 1/3 of the bulb exposed.

4)  Water well.  This is the only time you’ll water it until the shoot starts to show, or in 3 weeks, whichever comes first.  How easy is that? 

For decorative purposes, I covered the exposed dirt with Spanish moss and added a little tag to remind myself when to water next since I’m still responsible for this plant until I give it away.

Amaryllis with bow

A reminder to water is a good idea!

At this point, the bulb does not need light, but it does need warmth to sprout.  Keep it in a room above 60 degrees and the bulb will start to shoot up in 2-3 weeks (some varieties may take longer, so be sure to note the grow times on the package).  If you’re in a hurry, you can put the pot on a heating pad on low and it will bloom even faster!

Once the bulb starts to grow, keep it in a sunny window, rotating every day or so to keep the stalks from bending toward the light.  It’s also important to stake the stalk to keep it from breaking as the flowers develop.

Water when the top inch of soil is dry.  Most people tend to over-water plants, so don’t baby it too much! 

If you like, you can give a picture of the bloom with the gift, or just let the flower color be a surprise.  If you are traveling with your gift, you might want to wrap it in cellophane to keep all the dirt where it belongs.  I simply tied a bow around the pot, added the poem, and this very simple homemade gift is ready to give!

simple Amaryllis gift idea

Variations: Amaryllis isn’t the only bulb that’s easy to force into bloom.  Most bulbs will bloom indoors, but some require chill time before they’ll sprout.  Paperwhites, however, can be grown just like amaryllis.  They look like dainty, white daffodils and are very fragrant.  Try planting some every few weeks in different pots for continuous indoor blooms!

Amaryllis can be grown in water.  Fill a glass container with several inches of pretty rocks, marbles, or decorative glass beads.  Fill with water to the top of the rocks and place the bulb on the rocks.  Be sure the water only touches the very bottom of the bulb or it will rot.  It will send down roots into the water and bloom just like it would if it was planted in dirt.

Amaryllis bulbs can be planted outdoors once they are done blooming inside.  You can even save the bulb and replant it inside next Christmas!  The instructions are easy to find online.  Simply Google “Plant an Amaryllis” and you’ll get all the help you need.

Tomorrow’s gift includes tiny lights and carrot noses. 

Crafts Leave a Comment

« Previous Page
Next Page »
I believe you can find grace for the mother you are and help to become the mother you long to be—a mom who has the freedom to choose the better things and enjoy her kids right now.

Recent Posts

  • Mr. Whitter’s Cabin
  • Stuck
  • When Your Heart is Hard Toward Your Child

Popular Posts

  • Mr. Whitter's Cabin
  • Stuck
  • When Your Heart is Hard Toward Your Child
  • Why She's Sad on Sundays
  • Failing Grade
  • I Should Have Married the Other Man

Sponsored Links

Copyright © 2025 Kristen Anne Glover · All Rights Reserved · Design by Daily Dwelling

Copyright © 2025 · Flourish Theme on Genesis Framework · WordPress · Log in