• Home
  • About
  • Archives
  • Contact

Kristen Anne Glover

Five in Tow

  • Marriage
  • Parenting
  • Faith
  • Christmas

Simply Homemade: Pocket Survival Kit

Simply Homemade

When it comes to making simple, homemade gifts for girls, things are easy.  Girls love hair bows, ornaments, pretty smelling bath bubbles, and just about anything Pinterest can conceive of.

Boys are another story.

Boys want things that shoot and cut and require batteries.  I don’t know about you, but I cannot crotchet a remote control helicopter.

All season, I have wondered what I could make that my outdoor-loving, snake-catching, fast-living boy would like.  I wanted him to more than like it, since I was going to put time into making it.  I wanted him to love it.

I wondered and wondered about it until one day, we met a man at a flea market who was selling knives and various outdoor supplies.  He happened to have a pocket survival kit that my son went crazy over.  I had found my solution.

A pocket survival kit is just what it sounds like.  It’s a small tin packed full of all the little goodies a boy might need to survive the wilds of his own backyard (except food and water–you want the boy to come home sometime). They sell them pre-packaged online at various sporting websites, and, apparently, at El Paso flea markets.

The great thing is, you can make one for much less money.  This is the perfect gift to make yourself because it gives you control over what goes in the box, and you can make it as fun or functional as you like simply by changing the quality and type of items you include.

You will also find that this Pocket Survival Kit is a great resource for teaching your child real-life skills like how to read a compass or how to start a fire.  It’s the kind of gift that leads to memorable moments of teaching and learning together.

Like all the gifts in this series, it’s completely easy to do.  All of the contents are readily available at any store that sells sporting or outdoor supplies, and most of them are very inexpensive (unless you decide to upgrade to better gear).

Here’s how you can make a Pocket Survival Kit for your own mini survival man (or woman).

How to Pack a Pocket Survival Kit

Pocket Survival Kit

You will need a small tin (an Altoids box or Sucrets tin is perfect). 

Everything you pack is going to have to go inside of this tin, which should be small enough to fit in your wilderness man’s pocket.  That means you need to get the smallest, yet most functional, versions of any or all of the following items:

A mirror (this is for signaling for help)

Laser pointer (also for signaling)

Emergency whistle (sometimes these are included in pocket knives or lasers, so keep an eye out for a dual-function tool to save space)

Pocket knife/multi-tool

A lighter***

Compass

Fish hooks

Fishing line

Rappelling clips (carabiners)

Wire saw

Emergency blanket (this will be too big to fit in your tin unless you cut it down to size or use a vacuum sealer to compress it)

Water purification tabs (because what could be cooler than drinking out of a mud puddle?)

Small bag (so you can purify said mud puddle)

Various sizes of safety pins

Razor blades, if the recipient knows how to handle these (secure them under the duct tape in any case)

Survival Tin

Once you’ve gathered all your items, pack everything in the tin.

Mark the back of the box with the Morse code signal for SOS.  Later, teach your child how to use the laser pointer or mirror to signal for help.  It’s fun!

SOS

SOS

If you look at the picture closely, you will see that I covered the tin with duct tape.  I also put another strip on the bottom.  You never know when duct tape could save a life. 

Close it up and your Pocket Survival Kit is ready for giving!

This makes a great stocking stuffer or gift for an outdoorsy young man or woman.  However, please use your discretion when giving a gift like this unless you are confident of the recipient’s maturity.  Be sure he or she knows how to handle the tools properly and is responsible with them.  If you have any question about any part of the kit, exclude it.

My nine-year-old son is very responsible and has been taught how to use each of the components of this box, and he has been   I would not worry about him abusing any of them.  But not every nine-year-old boy is the same!

Fire starters

Of these fire starting options, a lighter is probably the best bet

A note on fire starters

You will notice that I included several fire-starting options in the photo above, but only listed a lighter to included in the box.  Lighters are great fire starters, but you can choose any option you like.  Matches, magnesium strips, or even magnifying glasses can work.   I actually put several in the kit for my son because I opted to leave the emergency blanket out.

If you have to choose, a lighter is by far the most reliable in a real emergency situation.  If you pack a magnifying glass, it could be cloudy.  Matches get wet.  Magnesium strips are hard to use to build a real fire.

Choose the option that you like the best and which will be most interesting to your child.  Then, teach him how to use it safely and efficiently.

There you have it, a fantastic, simple gift for the boy in your life.  If he’s anything like my son, he’s going to love it.


*The posts in this series may contain affiliate links for your convenience.

Save

Crafts, Reviews 2 Comments

Simply Homemade: Inverted Christmas Tree

Simply Homemade

*Another Simply Homemade post!  To see the other ideas, start here.

I am a little nervous about this post.

I’m just not sure you all are going to be able to stick with me when I show you my crazy project.  I should trust you by now–after all, you’re still here even after I hung a metal mattress spring on the wall and called it art.

But I may have crossed the line this time.

It all started years ago when a woman at our church hung a full-sized, decorated Christmas tree upside down from the rafters in the foyer of our sanctuary.  It was all lit up and massive, and when I walked into church the first Sunday after she did it, I gasped because I had never seen anything like it before.  It was a Christmas tree chandelier!

That tree caused no small disturbance in our small community.  I mean, an upside down Christmas tree?  What does that even mean?  It could be sacrilegious and since that was before the Internet was really a thing, no one could Google it so no one knew for sure.

Some people liked it and some people hated it and practically everyone agreed that the board should have been notified before a Christmas tree was hung upside down in church.  

Personally, I couldn’t wait to grow up and make one of my own.

So this year, I did.

Inverted Christmas tree

Inverted Christmas tree and mattress art

Now, before you disown me, let me say that we have since arrived in the modern age so I Googled “What does an upside-down Christmas tree mean?” before I actually hung one from the ceiling.  To my relief, Google assured me that an upside-down Christmas tree is no more irreligious than a regular Christmas tree.  So that’s good.  I think.

Also, you will notice that my inverted Christmas tree is ombre.  I’m probably about three years too late for the ombre trend, but such is my life.  For instance, I have finally made my peace with chevron and I’m pretty sure that trend is over too.

Anyway, I thought the shape of an upside-down Christmas tree lent itself to a variegated color scheme, so I went for it, trend or no trend.

Upside down Christmas tree

Is ombre over?

Also, I had the little problem of the color scheme in our rental house.  I had to pick colors that wouldn’t clash with the mustard-on-terra-cotta look we have going on.  So, that’s not hard.

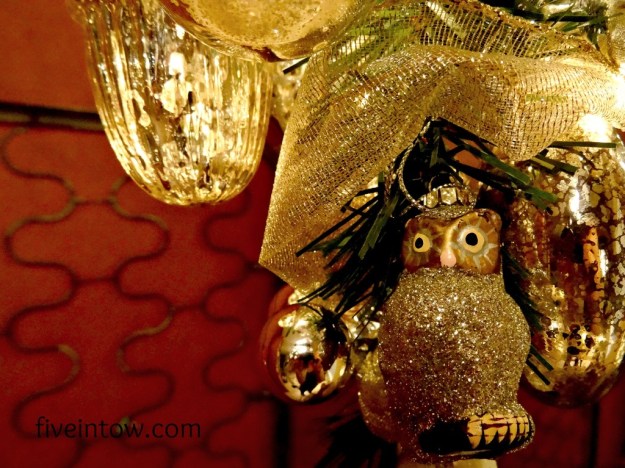
I could have gone with plain gold or silver ornaments, but I wanted something with more impact.  So, I decided to start out with rich chocolate ornaments, fade to deep crimson, then copper, gold, and finally, silver.

Ombre Christmas Tree

Anyone want to talk to my landlord about those walls?

You could do an ombre tree in any colors your husband won’t divorce you over.  I think deep purple fading to silver would be fantastic (except it wouldn’t look good next to mustard-fading-to-ketchup walls).  I was tempted to go with various shades of green, but since I already had quite a few gold, silver, and burgundy ornaments in my stash, I decided to spend a little less on “charitable giving” to Hobby Lobby this year and use what I had.

If you’re still reading this post, you might want to make an inverted Christmas tree yourself.  Or, perhaps, you wonder how I convinced my husband that Hobby Lobby is a home for disenfranchised children and all those credit card charges are really donations to charity.

It’s simple (the tree, that is).   This is what you’ll need:

An artificial tree (mine is 3′)

Lights!

Ornaments!  Go ombre or go home!  Just kidding.  You can decorate however you like.  I’m not a hater.  Just make sure you have a LOT of ornaments (see below).

Ribbons!

A ceiling hook.  I used two Monkey Hooks because they hold a ton of weight.

Green floral wire

ombre inverted tree

Ombre inverted Christmas tree at night

How to Make an Inverted Christmas Tree

(Ombre Optional)

1) Discard the flimsy little legs that come with your tree and make sure that the trunk has no moving parts that might come loose when you flip the tree upside down.  If it does, toss those too.  You want a solid trunk, nothing more.

2) Wrap floral wire around the trunk to create a loop by which to hook the tree from your ceiling.

3) Wrap lights and ribbon around your tree.  Wrap the ribbon all the way up the trunk to the ceiling to cover the hook so it looks like the trunk is going right into your beautiful popcorn ceiling (see below for a flashback to the ceilings of yesteryear).

Wrapped Christmas tree trunk

4) Now you can start adding ornaments.  You’ll need a lot.  I mean, somewhere between a bazillion and a gazillion.  You might think you have enough when you start this project, but you are wrong.  Then you will go to the store to buy some more, but you will be wrong again.  Just get them all.  All the ornaments you can find.

Fortunately, you can pick up ornaments on the cheap at thrift stores, garage sales, or the Hobby Lobby Home for Disenfranchised Children (wink, wink).  Place a few special ornaments in strategic places and they will “hide” the cheaper ornaments.

Ombre ornaments

Wire the ornaments directly to the branches so they won’t fall off.  If you secure them well enough, you may be able to store them on the tree when the season is over.

5) Stand back and admire your work!  Or, if you’re insecure, stand back and wonder if an inverted Christmas tree is just plain weird.

Inverted ombre Christmas tree

An inverted Christmas tree and a quiet place to write

I happen to like the way it looks over the little freebie desk I decoupaged.  I would even go so far as to suggest that this would be a great project to make for someone who can’t have a Christmas tree because of pets or small children, or for the couple that’s just starting out.

Or maybe it makes the perfect place to sit and spend a silent night.  And couldn’t we all use one of those?

christmas lights at night

*Tomorrow’s Simply Homemade project is not upside-down at all.  But it does involve duct tape.  In other words, it’s one for the guys.


Save

Crafts, Decorating, Decorating, Home 10 Comments

Simply Homemade: Sugared Bath Bombs

Simply Homemade

I’m as giddy as a schoolgirl about today’s Simply Homemade project.  We’ve been making some pretty fun projects since the series started, but this one takes the cake.  The cupcake, to be exact.

Bath cupcakes

A cupcake?

“What’s the big deal?”  You might be thinking.  The cupcake trend has peaked, hasn’t it?  Aren’t we all over cupcakes?

I will pretend I didn’t hear you and offer this little comfort: you won’t be eating these cupcakes.  You and your hips are perfectly safe with me.

These cupcakes are for the bath.  That’s right!  Today’s Simply Homemade project features DIY Sugared Bath Bombs.  Cupcake bath bombs.  Squeeee! 

DIY Sugared Bath Bombs

What good little girl (or grown-up little girl) wouldn’t want to receive one of these in her stocking on Christmas morning?

You all do?

No problem.

Naturally, Sugared Bath Bombs are so easy to make, I can whip up a batch of these in less time than it takes to make the real thing, and with far fewer ingredients.  Here’s how I cooked them up in time for gift-giving.

How to make Sugared Bath Bombs

Ingredients:

1 c. baking soda

1/2 c. corn starch

1/2 c. Epsom salts

1/2 cup instant drink mix, like Crystal Light or unsweetened Kool-Aid, with “citric acid” listed as the first ingredient.  You can also use 1/2 cup plain citric acid, available at health stores or through Amazon.  But of course, you’ll want to make these right away and who has time to wait for UPS?

1/3 cup oil  *Any oil will do; I used equal parts coconut oil and calendula oil for their skin-loving properties.  Almond oil, melted shea butter, and even olive oil would be great alternatives.

*Note: If you use plain citric acid, you will want to add 1 t. essential oils in a scent you like.  Try lavender, peppermint, or lemon.  Essential oils get expensive, which is why I used drink mix.  However, essential oils have so many wonderful health benefits, it’s worth the expense if you’re doing this on a small scale.

**If you went the plain citric acid route, you may also want to add a bit of natural food coloring.  Just a few drops will do.  After all, you don’t want your bath water to look like Kool-Aid.  If you use a drink mix for the citric acid component, it will already be flavored and scented, but it won’t look like Kool-Aid.

For Icing:

6 cups powdered sugar

4 egg whites

Extra Stuff You’ll Need:

Sprinkles, raw sugar, or other edible decorations

Cupcake wrappers

Christmas cupcake wrappers

Instructions:

Blend the dry ingredients very well.  I put all the dry ingredients in my Vitamix and let it whir for a minute.  It’s important to incorporate the citric acid throughout if you want the bath bombs to fizz consistently.  If you do not have a blender, just employ some child labor to do the mixing.

Bath bomb recipe

When the dry ingredients are maxed out on the mixing, slowly add the oil.  Do this about a  tablespoon at a time, mixing well between additions.

Soon, the mixture will begin to clump together.  When you can press it into your first and it holds its shape, you’re done.

DIY Bath bombs

Distribute the mixture into your cupcake tins.  I used 12 wrappers, but if you want fatter bath bombs, use fewer wrappers.  It’s not an exact science.

Press the mixture into the wrappers using as much pressure as you can.  You want the bombs to hold their shape!  We used a 1/4 measure as a press.

DIY Cupcake bombs

Ignore my messy-looking stoneware cupcake pan.  That’s what we call “seasoned.”

Set the bath bombs aside to dry and harden while you make the icing.

Icing Action:

This type of Royal Icing dries hard, which is what you want if your Sugared Bath Bombs are going to make it to Christmas morning without looking all smooshy.  Smooshy=not the spirit of Christmas.

In a mixing bowl with a whisk attachment, beat the egg whites and powdered sugar until it turns glossy and peaks form.  The peaks should be stiff enough to stand up but soft enough to bend a little at the ends.

Pipe the icing onto the tops of the cupcakes using a pastry bag.  You can also use a Ziploc bag with one corner cut off, which is what I did because I have no idea where the movers packed my my cake decorating supplies.  They’re probably in with the winter coats.

You can also use a star tip, if your movers left your cake decorations alone.

DIY bath bomb cupcakes

Sprinkle the cupcakes with edible decorations while the icing is wet.  It sets quickly, so work fast!

Allow your pretty little Sugared Bath Bombs to cure overnight, if possible, to give the icing time to harden all the way through.

Package your Sugared Bath Bombs in cellophane and ribbons and all the usual suspects.

Cupcake Bath Bombs

Or, gift one on a pretty little thrifted plate.

DIY bath cupcake

That’s all there is to it.  Who new fat-free, calorie-free cupcakes could be so easy?

So, fill up some stockings, fill up the tub, and enjoy your very own Simply Homemade creation!

*Safety notes for not-very-sensible people: Do not eat these.  You probably won’t die if you do, but let’s not find out.  It’s probably not a good idea to give these to small children because even if you tell them not to eat them, they will.  In fact, if you tell them not to eat these, they will be 100x more likely to do so.

Secondarily, the oils in these Sugared Bath Bombs can make the tub slippery.  It is best not to dance the polka while bathing with one of these fizzing away in the water.  I know.  I’m such a spoil-sport.

One last thing, because I know you’ll ask: Yes, it’s okay to bathe with frosting.  I won’t tell.  Big stores sell sugar scrubs for lots of money.  This is just a sugar scrub minus the scrub, minus the big money.  Your tub will not mind, and even the sprinkles will dissolve in the water (that’s why we chose edible embellishments on an item you can’t even eat).

Now, go get yourself some citric acid.

Join us tomorrow for another Simply Homemade project!  I’d give you a clue if I had one.

Save


Crafts, Health and Beauty 2 Comments

« Previous Page
Next Page »
I believe you can find grace for the mother you are and help to become the mother you long to be—a mom who has the freedom to choose the better things and enjoy her kids right now.

Recent Posts

  • Mr. Whitter’s Cabin
  • Stuck
  • When Your Heart is Hard Toward Your Child

Popular Posts

  • Mr. Whitter's Cabin
  • Stuck
  • When Your Heart is Hard Toward Your Child
  • Why She's Sad on Sundays
  • Failing Grade
  • I Should Have Married the Other Man

Sponsored Links

Copyright © 2025 Kristen Anne Glover · All Rights Reserved · Design by Daily Dwelling

Copyright © 2025 · Flourish Theme on Genesis Framework · WordPress · Log in