• Home
  • About
  • Archives
  • Contact

Kristen Anne Glover

Five in Tow

  • Marriage
  • Parenting
  • Faith
  • Christmas

How to Fix Furniture with Mayo

How to Fix Furniture with Mayo

Last Friday, we got a bigger dining room table.  It’s from Pottery Barn, ya’ll.  Remember my love affair with Pottery Barn?

Even though it isn’t new, it’s the only thing in my house from Pottery Barn (and probably always will be),  Better yet, all my kids can fit around it with room for company (as long as that company doesn’t have personal space issues), so I kind of love it.

Two days after we hauled that baby into the dining room, I scorched the top.  If you follow my Five in Tow Facbebook page, you already heard the confession.  Basically, I plunked my red-hot cast-iron Dutch oven smack down on top of that thing, and even though I had hot pads underneath the pot, it didn’t matter.

When I cleared the table after dinner, I saw a huge, ugly white mark right in the middle of the table.  I ruined my Pottery Barn table two days after taking possession of it!

This is why we can’t have nice stuff.   I am not worthy.

I almost burst into tears right then and there.  Then I remembered some old trick involving mayonnaise and wood.  Really, that’s all I had.  I couldn’t even remember what the mayo was supposed to help with but I grabbed the jar from the fridge and smeared some right on that horrific mark.

It disappeared. 

I could not believe it.  I can have nice things after all!  I can!

In my distress about the table, I did not think to take a picture before smearing on the condiments, but I did post my success to Facebook.  I went on there and told you all how to fix furniture with mayo.

That started an interesting question.  Some of you had heard of the ol’ mayo trick but had not had such stellar results.  You were sad because you could not fix your furniture with mayo.

That got me thinking.  I had some ideas of why my table responded so well to the mayonnaise, and it had to do with heat.  The spot on my table was still warm when I applied the mayo, and I wondered if that had anything to do with the amazing results.

I decided to do some experimenting.

CAN MAYO REALLY FIX FURNITURE?

It just so happens that I also ruined another piece of furniture a few years ago (see note above about not being able to have nice things).  My mother-in-law gave me an antique dresser when we first got married.  Technically, she loaned it to me, but I’ve got squatter’s rights on it now.

Besides, there’s the awkward fact that I made a huge watermark on the top of that very dresser because I didn’t realize the fern I had watered completely overflowed.  Water pooled up under the pot and sat there grinning until I noticed it later that night.

By then, it was too late.

I didn’t know what to do so I’ve been hiding that awful spot under piles of clothing for the last two years.  My husband thinks I’m a slob.  Really, I just can’t have nice things (see note above).

Watermarks on furniture

Do you think she’d notice something is different about it?  I mean, it has been a few years.

Water damaged furniture

It seemed this piece of furniture was prime for a little..experimentation (my husband agrees, especially if experimentation is synonymous with burning).  If anything screams, “You’ve got nothing to lose!” it’s this dresser.

First, I smeared mayonnaise all over the watermark and let it sit.  I didn’t notice much, if any, difference.  Some of the very faint marks looked a little better, but it was negligible.

It was time to test my hypothesis.

SO…I got out my hair dryer.  Holy smokes.  Check out what happened.

Furniture Restoration with mayo

I put the hair-dryer on high, and half-an-hour later, it looked like this:

Repair furniture with mayo

That’s a two-year-old, nasty watermark, and it almost disappeared!  In case you forgot how horrific it looked before, here’s the side-by-side:

Use Mayo to erase watermarks

I noticed that the darker places were the peaks of the mayo.  In other words, the places where the mayo was the thickest turned out the darkest.

So I went gangster with the mayo on that watermark. Fix furniture with mayo

Overkill, perhaps?

This time, I heated the wood before I applied the mayonnaise.  Then, I smeared it on thick and hit it with more heat.  I know you’re thinking, “I don’t have time to blow-dry a dresser.”  Neither do I.  So, I rigged up this high-tech automatic blow-drying device.  Ta-da!
Furniture Repair with Mayo

After three rounds, the dresser looks like this:

The Amazing Mayo Trick

Now, it’s not perfect, especially since the water damage actually changed the texture of the top of the dresser.  But it’s significantly better than it was earlier today.  Given the level of damage on this particular piece of furniture, I’d say the mayonnaise did an amazing job!  In fact, I could probably get away with putting just one bird on it.

Furniture repaired by mayo

MAYO FOR THE WIN!

I’m pretty convinced.  Mayonnaise does an amazing job of restoring furniture damage due to heat, water, or (ahem) neglect.

What does this mean?

We can all have nice things!  (Just keep the mayo close by).


Decorating, Home 12 Comments

Simply Homemade: Pocket Survival Kit

Simply Homemade

When it comes to making simple, homemade gifts for girls, things are easy.  Girls love hair bows, ornaments, pretty smelling bath bubbles, and just about anything Pinterest can conceive of.

Boys are another story.

Boys want things that shoot and cut and require batteries.  I don’t know about you, but I cannot crotchet a remote control helicopter.

All season, I have wondered what I could make that my outdoor-loving, snake-catching, fast-living boy would like.  I wanted him to more than like it, since I was going to put time into making it.  I wanted him to love it.

I wondered and wondered about it until one day, we met a man at a flea market who was selling knives and various outdoor supplies.  He happened to have a pocket survival kit that my son went crazy over.  I had found my solution.

A pocket survival kit is just what it sounds like.  It’s a small tin packed full of all the little goodies a boy might need to survive the wilds of his own backyard (except food and water–you want the boy to come home sometime). They sell them pre-packaged online at various sporting websites, and, apparently, at El Paso flea markets.

The great thing is, you can make one for much less money.  This is the perfect gift to make yourself because it gives you control over what goes in the box, and you can make it as fun or functional as you like simply by changing the quality and type of items you include.

You will also find that this Pocket Survival Kit is a great resource for teaching your child real-life skills like how to read a compass or how to start a fire.  It’s the kind of gift that leads to memorable moments of teaching and learning together.

Like all the gifts in this series, it’s completely easy to do.  All of the contents are readily available at any store that sells sporting or outdoor supplies, and most of them are very inexpensive (unless you decide to upgrade to better gear).

Here’s how you can make a Pocket Survival Kit for your own mini survival man (or woman).

How to Pack a Pocket Survival Kit

Pocket Survival Kit

You will need a small tin (an Altoids box or Sucrets tin is perfect). 

Everything you pack is going to have to go inside of this tin, which should be small enough to fit in your wilderness man’s pocket.  That means you need to get the smallest, yet most functional, versions of any or all of the following items:

A mirror (this is for signaling for help)

Laser pointer (also for signaling)

Emergency whistle (sometimes these are included in pocket knives or lasers, so keep an eye out for a dual-function tool to save space)

Pocket knife/multi-tool

A lighter***

Compass

Fish hooks

Fishing line

Rappelling clips (carabiners)

Wire saw

Emergency blanket (this will be too big to fit in your tin unless you cut it down to size or use a vacuum sealer to compress it)

Water purification tabs (because what could be cooler than drinking out of a mud puddle?)

Small bag (so you can purify said mud puddle)

Various sizes of safety pins

Razor blades, if the recipient knows how to handle these (secure them under the duct tape in any case)

Survival Tin

Once you’ve gathered all your items, pack everything in the tin.

Mark the back of the box with the Morse code signal for SOS.  Later, teach your child how to use the laser pointer or mirror to signal for help.  It’s fun!

SOS

SOS

If you look at the picture closely, you will see that I covered the tin with duct tape.  I also put another strip on the bottom.  You never know when duct tape could save a life. 

Close it up and your Pocket Survival Kit is ready for giving!

This makes a great stocking stuffer or gift for an outdoorsy young man or woman.  However, please use your discretion when giving a gift like this unless you are confident of the recipient’s maturity.  Be sure he or she knows how to handle the tools properly and is responsible with them.  If you have any question about any part of the kit, exclude it.

My nine-year-old son is very responsible and has been taught how to use each of the components of this box, and he has been   I would not worry about him abusing any of them.  But not every nine-year-old boy is the same!

Fire starters

Of these fire starting options, a lighter is probably the best bet

A note on fire starters

You will notice that I included several fire-starting options in the photo above, but only listed a lighter to included in the box.  Lighters are great fire starters, but you can choose any option you like.  Matches, magnesium strips, or even magnifying glasses can work.   I actually put several in the kit for my son because I opted to leave the emergency blanket out.

If you have to choose, a lighter is by far the most reliable in a real emergency situation.  If you pack a magnifying glass, it could be cloudy.  Matches get wet.  Magnesium strips are hard to use to build a real fire.

Choose the option that you like the best and which will be most interesting to your child.  Then, teach him how to use it safely and efficiently.

There you have it, a fantastic, simple gift for the boy in your life.  If he’s anything like my son, he’s going to love it.


*The posts in this series may contain affiliate links for your convenience.

Save

Crafts, Reviews 2 Comments

Red Handed (Or, What I Stole from Pottery Barn, Part 2)

Yesterday, I confessed to all of you how my secret adoration for Pottery Barn led me down a path of destruction.  At first, it was simple coveting.  All I really wanted was to have a mossy fireplace in my bedroom, with twinkling white lights on the mantle and a miniature sawhorse by my bed.  mossy fireplace

I thought it was perfectly normal.  I mean, what warm-blooded girl doesn’t want a miniature sawhorse by her bed?

Most of my coveting was contained to catalog perusal and an occasional foray into an actual store.  However, I usually left faster than I came because I felt like I had the words, “Doesn’t Own a Single Tasting Plate” emblazoned on my forehead, and people were staring.

But it all changed the day I saw this chandelier:

Pottery Barn ChandelierAt $499, it was about $499 over budget, but I had to have it.

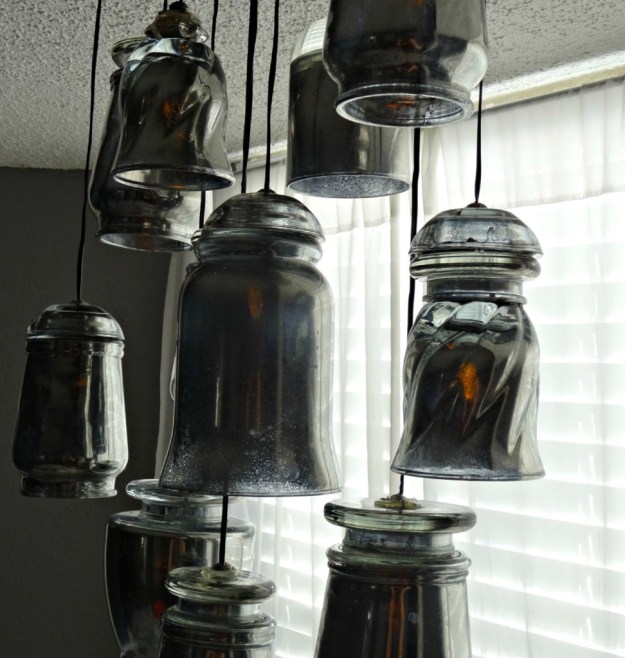
So I decided to steal Pottery Barn’s eclectic hand-blown-glass idea right out from under them.  I made one of my own.

Pottery Barn knock-off

See that light?  I totally stole it from Pottery Barn.  

Now, I will be the first to admit that the Pottery Barn chandelier is way cooler than my knock-off.  But a nearly $500 difference in cost goes a long way in making me feel better about my project.  Every time I start to think it doesn’t look as good as the catalog version, I just whisper, “That’s a $500 chandelier you just made out of juice cups,” and I smile.

The first thing I did was gather a collection of glassware since Santa has yet to bring me a 2,500 degree furnace and a blowpipe.  Clearly, glassblowing was out of the question.  That meant I had to give up the mottled look of the glass in the chandelier I loved.

Score one for Pottery Barn.

However, I didn’t really need to blow glass because I already had an eclectic collection of glassware thanks to my children’s innate ability to break any cups that match.

Also, I had already decided to make mercury glass pendants instead of trying to replicate wavy blown glass.  Mercury glass has interesting color variations and a mottled look, but it has the added benefit of being metallic, which I wanted in my chandelier because it was going to be part of my ongoing master bedroom design.  Our master bedroom has deep gray walls, and we can’t paint them.  The silver of the mercury glass would be a perfect accent.

Score one for ME!

I searched the cupboards for glasses with curvy sides and rims around the tops to replicate the look of the Pottery Barn pendants.  Cheap glass vases worked well too, as did glass storage jars (the kind that have a rubber seal and separate glass lid) because they have a nice, thick rim.

I saved the glass lids from the storage jars and even purchased a few half-round glass votive candle holders.  You’ll see why in a minute.

In order to create the mercury glass look, I purchased a can of Krylon Mirror spray paint.  It’s exactly the same stuff as this:

Krylon Looking Glass Mirror-Like Paint

It is expensive, especially since you only get 6 oz. per can.  But, I used a 40% off coupon at Hobby Lobby to get it a bit cheaper.  Happily, one can lasted the entire project.  Whew!

Making mercury glass is super easy.  Simply collect your glassware and take it outside.  Be sure to remove the rubber seals from around any glass lids.  You don’t need to wash the glass first unless it is visibly dirty.  Then, spray each piece very lightly with water on the inside only.  Don’t overdo it–you want just a very light mist so little droplets form.  In fact, it’s a good idea to shake the jar after you’ve sprayed it so the droplets disperse and don’t run.

After you’ve done this, spray a very light coat of mirror spray paint on the inside only of each jar or glass piece.  Just stick the can right in the jar and spray a light coat.  The spray paint traps the water underneath, creating interesting bubbles, runs, and color variations, just like real mercury glass.

DIY Mercury glass

Light coats of spray paint work best.  Otherwise, the silver runs.  If this happens, don’t worry.  Just roll the paint around in the jar to spread it out as evenly as possible.  Then, add another coat later on to make the run less visible.

Let your jars dry in the sun between coats, and then repeat the steps until you like the look of your jars.  Hold them up to the light and take a good look at them.  Now is the time to add coats if you don’t love it!  Do the insides of the lids and the votive holders as well, if you have them.

Let everything dry completely.  You now have mercury glass!

Eclectic glassware

“Mom? Where are all the cups?”
Seriously? I’m working here.

Using a hot glue gun, I attached the lids to the bottoms of the cups and jars.  I tried lots of other kinds of glue, including toxic “industrial strength” stuff, but it just didn’t hold.  Hot glue worked the best.

I did not have enough lids for all of my glass pieces, but that was okay.  I left some plain and attached the glass votive holders to others.  Adding these extra glass pieces transformed the look of the cups and jars.  They didn’t look as much like cups and jars any more, but began to look more and more like the pendants I was trying to steal.

Mercury Glass Pendants

The transformation begins

Once the glassware was painted and assembled, it was time to attach electrical cord to hang them by.  You can get electrical cord from a place like Home Depot or from your children’s annoying electric toys.  Either way, it is not expensive.

You could also use ribbon or cording, but I wanted the chandelier to look like it could actually work, even though I had no way of electrifying the thing.

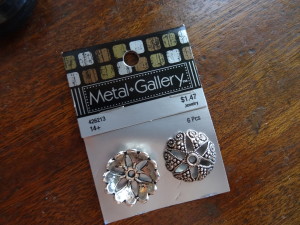
I strung the electrical wire through metal jewelry findings like this and secured the ends with excessive amounts of hot glue.Jewelry findingsThese were attached to the pendants with even more glue.  I did not want them coming loose.  They were going to be hanging over my sleeping head, after all.  Mercury Glass chandelierNow that the pendants were ready, it was time to attach them to a board.  My husband rustled up a piece of Hemlock and cut the 1×4 to about 2 1/2 feet long.  I stained it a dark espresso color, added a coat of polyurethane, and drilled holes to string the electrical cord through so I could attach them.

Using these handy little clips to hold the pendants, I arranged them the way I wanted by suspending the board between two chairs and fiddling with the design until I liked it.

Mercury Glass chandelierThe excess electrical wire was trimmed and held down as flat as possible into more globs of hot glue.  Those babies aren’t going anywhere.

Now, I really wanted my chandelier to light up, even though I couldn’t actually add electricity to it.  So I ordered some remote control LED votive candles.  Only, they didn’t come in time.  I had to go to the store to get some cheap LED votive candles just for this post.  See?

LED votive candles

I stuck one in each pendant using Velcro dots to hold them in place.

When everything was done, we hung the chandelier up in the cove that holds our bed.  I’m working on the pillow thing.  Don’t look at that yet.

DIY Pottery Barn Chandelier

DIY Paxton Glass Chandelier

Pendant Chandelier

It may not be Pottery-Barn-perfect, but my chandelier also didn’t cost Pottery Barn money.  The entire project cost about $30, including the back-up set of candles.

And even though it didn’t come from the store, my version of the Paxton Glass Light Pendant makes me feel like I’ve gotten a little bit closer to living the Pottery Barn Land dream.

Now I just have to figure out how to get moss to grow on my fireplace. 

Decorating, Home 20 Comments

Next Page »
I believe you can find grace for the mother you are and help to become the mother you long to be—a mom who has the freedom to choose the better things and enjoy her kids right now.

Recent Posts

  • Mr. Whitter’s Cabin
  • Stuck
  • When Your Heart is Hard Toward Your Child

Popular Posts

  • {23} Dangerously Beautiful
  • Spinach and Black Bean Burgers with Chipotle Aoli
  • Counting the Hours
  • Non-Dairy Coconut Creamer
  • {29} Beyond Rescuing
  • {31} Return to Me

Sponsored Links

Copyright © 2023 Kristen Anne Glover · All Rights Reserved · Design by Daily Dwelling

Copyright © 2023 · Flourish Theme on Genesis Framework · WordPress · Log in